Project Dream’s some exciting features give you more control over how you create and refine architectural visualizations. Here’s how Text to Image, Image to 3D Model, Video Upscale, Video to Video and Reference to Video work in practice.
1. Text to Image
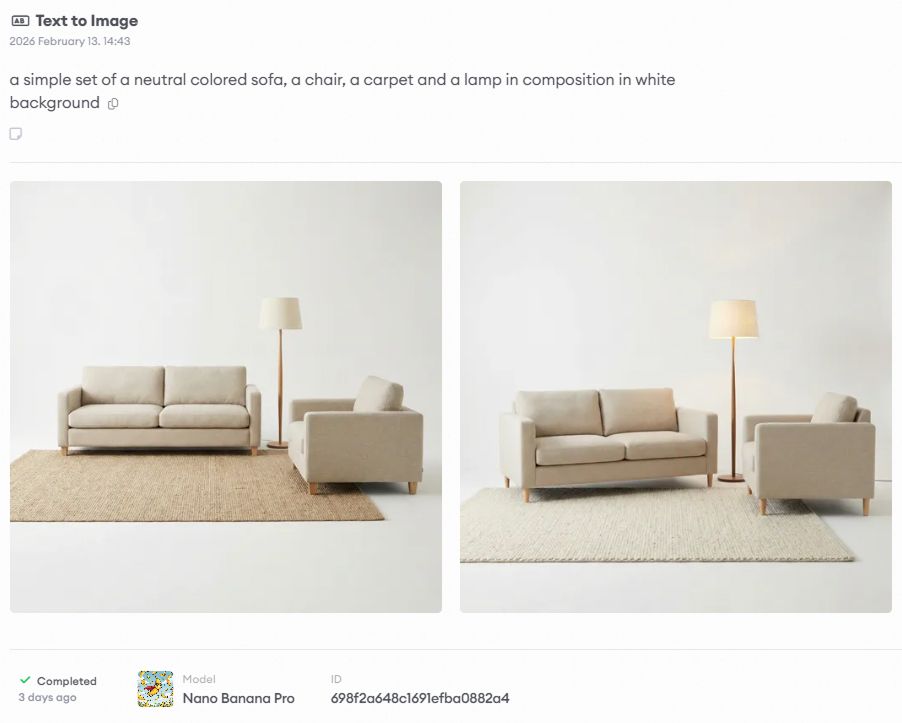
Text to Image generates architectural visualizations from written descriptions. Test out moods and scenarios within seconds! Just describe what you want to see and the AI creates it.
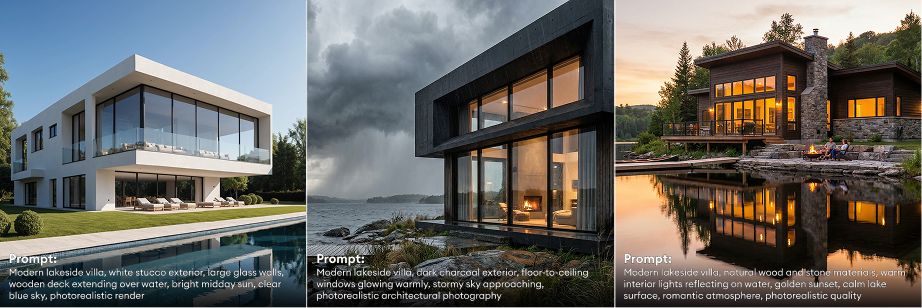
Same concept shown in 3 different styles generated with the Text to Image feature
How to use it:
Open Text to Image in Project Dream, write a detailed prompt describing your vision, and generate. Be specific about architectural style, materials, lighting, composition, and mood.
Real-world applications:
Generate concept visuals for early client presentations before detailed modeling begins. Create multiple design direction options quickly to test which aesthetic resonates. Produce marketing imagery for project announcements or competition submissions without a 3D buildout.
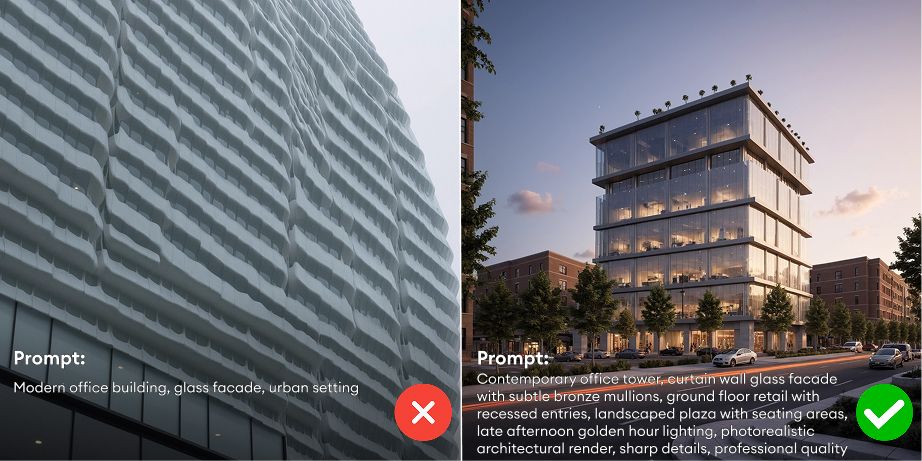
Difference in results when simple vs detailed prompt is entered
2. Image to 3D Model
Image to 3D Model converts 2D images into three-dimensional models that you can use in your architectural workflow. Upload a rendering, photograph, or AI-generated image and get back a 3D mesh.
How to use it:
Upload an image to Project Dream, select Image to 3D Model, and process. The AI analyzes depth, geometry, and spatial relationships in your 2D image to construct a 3D model. Export highly realistic AI-generated 3D models in production-ready formats compatible with your 3D pipeline.
2D images generated with the Text to Image feature to be used as a reference
Real-world applications:
Convert AI-generated concept images into base geometry for further development in Rhino, 3ds Max, or other 3D software. Transform client reference photos of existing furniture or fixtures into models for your interior visualizations. Generate 3D assets from photographic references without manual modeling. Create placeholder geometry from sketch renderings for early massing studies.
The 2D reference image turned to 3D model
3. Video Upscale
Video Upscale increases the resolution of existing videos without re-rendering. Take 720p or 1080p footage and output at higher resolutions up to 4K.
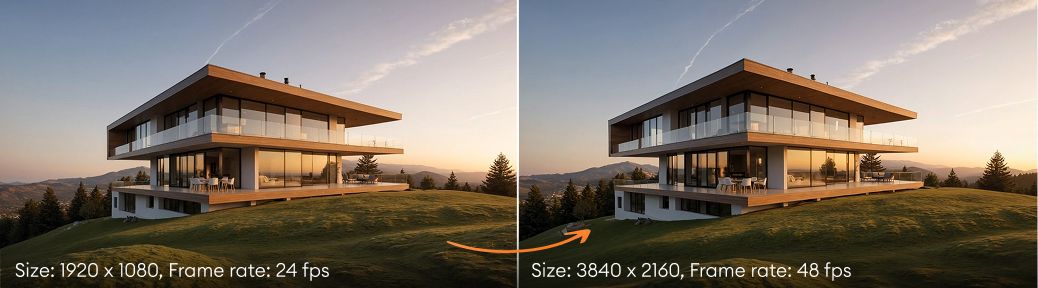
The before & after comparison of the upscaled video
How to use it:
Select any video in your Project Dream library, click Video Upscale, choose your target resolution, and process. The AI sharpens edges, recovers texture detail, and maintains smooth motion.
Real-world applications:
Render your animations at lower resolution and every second frame to cut render time in half, then let the AI handle the rest . Works for both traditional renders and AI-generated videos, so you’re not locked into high-res settings from the start.
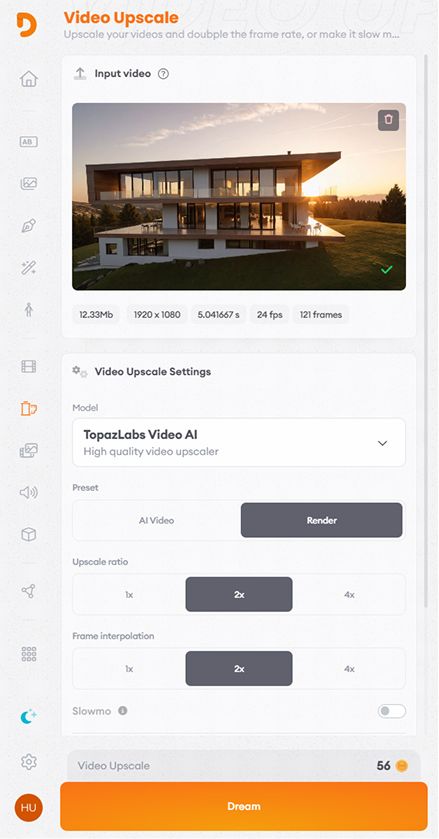
Video Upscale resolution options
4. Video to Video
Video to Video transforms existing footage while keeping camera movement and composition intact. Upload any video and use text prompts to change the visual style, lighting, materials, or atmosphere.
How to use it:
Upload a video (viewport recording, previous render, or site footage), write a prompt describing the desired transformation, and generate. The AI preserves motion and structure while rebuilding visuals according to your description.
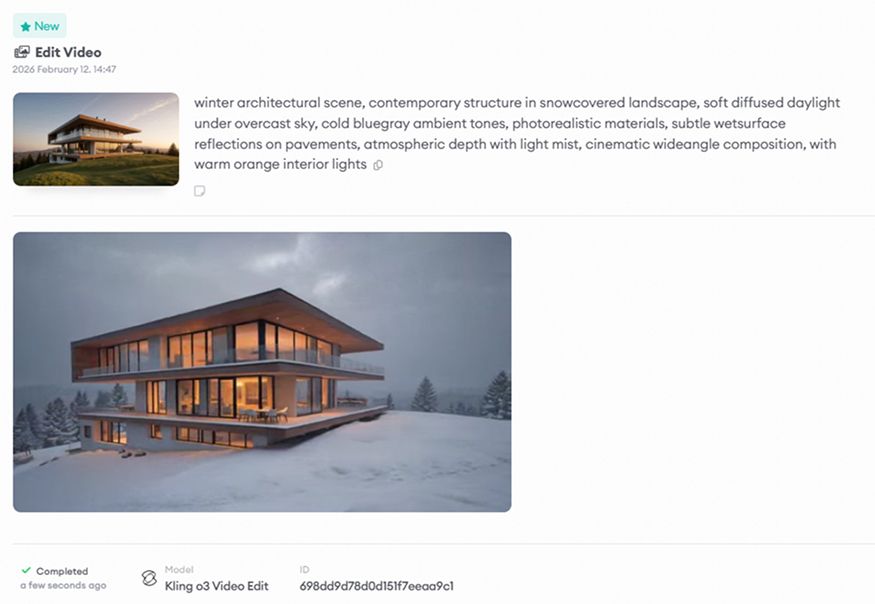
The landscape settings changed with Video to Video feature
Real-world applications:
Export a quick viewport walkthrough from Rhino or Revit to test camera movement, then transform it into photorealistic visualization for client presentation. Take an approved daytime walkthrough and create nighttime versions to show different lighting scenarios. Generate multiple material and aesthetic variations from one base animation for design reviews.
New video generated in a different location setting from the original input video
5. Reference to Video
Reference to Video creates b-roll footage for your architectural films by using reference images as style guides. Upload reference photos that capture the mood, lighting, or aesthetic you want, then generate video content that matches that visual direction.
How to use it:
Upload one or more reference images showing the look you’re after (architectural photography, film stills, existing project imagery). Write a prompt describing the video content you want to generate. The AI uses your references to guide the visual style while creating new footage based on your description.
Real-world applications:
You’re editing your project film and need a transition shot between your exterior walkthrough and interior reveal. Upload frames from both scenes as references, then generate a detail shot of the entrance or landscaping that bridges the two with matching lighting and color grading. Your presentation video has a specific visual language established in the opening shots, but you need additional contextual footage halfway through. Reference those opening frames to generate supplementary scenes that maintain visual consistency throughout the entire film.
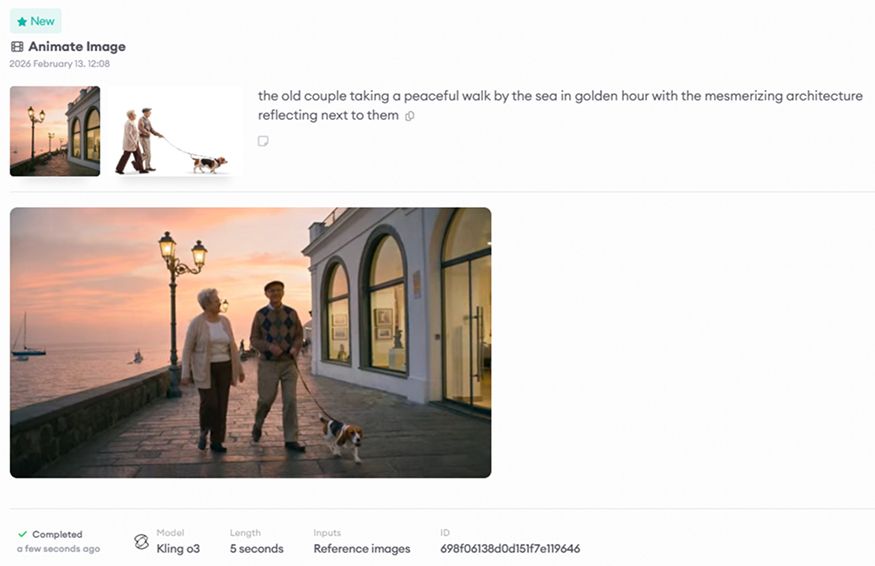
Turning a set of reference images into an architectural b-roll
The final result
Using These Tools Together
These features integrate with each other and Project Dream’s existing tools. Generate a concept with Text to Image, animate it with Animate Image, then upscale for final delivery.
All these features are available now in Project Dream.